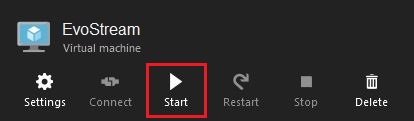
Starting the EMS Machine
All the virtual machines in your account is seen under the Virtual machines in the left-side menu bar.
Click on the Virtual Machine name. Click on Start.
Connecting To EMS
After starting the EMS instance, you will need to connect to your EMS to use it. Here are the steps on how you can connect to EMS using EMS WebUI, SSH Terminal, Windows PuTTy, and EMS HTTP Based API.
EMS WebUI
Using a browser, you can access your EMS with the help of UI. The WebUI is started by default, all you need to do is to open the UI in your browser:
format: <EMS_IP>:<WebUI_Port>

sample: 55.66.77.901:4100
This will redirect you to the login page. Log in using the following:
Username: admin
Password: <VM_Name>
After logging in, you may change your password in the Web UI’s Profile page  .
.
To more know about the the EMS Web UI, please click here.
SSH via Terminal
-
Send command:
ssh <username>@<IP_address>user@ubuntu:~/Desktop$ ssh user@11.221.105.202 The authenticity of host '111.221.105.202 (111.221.105.202)' can't be established. RSA key fingerprint is ae:02:ee:41:ff:38:96:ab:78:7b:3a:e6:09:ed:1f:4c. Are you sure you want to continue connecting (yes/no)? -
Input “yes”, press Enter
Warning: Permanently added '111.221.105.202' (RSA) to the list of known hosts. user@111.221.105.202's password: -
Enter password, press Enter. You can now use EMS capabilities!
Note: EMS is already running. You can check it by sending ps -e|grep evo
$ ps -e|grep evo
  4627 pts/0    00:00:01 evostreamms
  4628 pts/0    00:00:00 evo-node
  4629 pts/0    00:00:00 evo-node
  4635 pts/0    00:00:01 evo-node
Note: SSH is not enabled in Windows template
Connecting via SSH from Windows (PuTTy)
Pre-requisites:
-
PuTTY Secure Shell Client
-
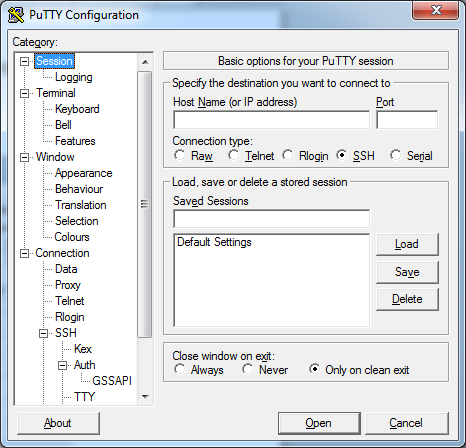
Run PuTTY
-
Select Session under the category tree
-
Specify the destination you want to connect to:
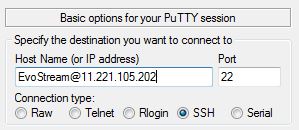
Host Name – the public IP address of the instance running EvoStream Media Server
Port – 22 (default)
Connection type – SSH
-
Click Open
-
Click Yes to accept the security key on the PuTTy Security Alert Window
-
Enter the username’s password, hit Enter
Using username "EvoStream". EvoStream@111.221.105.202's password: -
You are now connected to the machine!
HTTP Based API
For the EMS on Azure, the HTTP based API is exposed, but it requires authentication to be used. We call this Proxy Authentication. Basic Authentication is used and so just a username and password are required:
- Username: evostream
- Password: “
<computer_name>” - the computer name set to the virtual machine, this will be seen in webconfig.json
Command will take this general format:
http://Username:Password@IPAddress:Port/apiproxy/CommandName?params=<base64EncodedString>
Run the command in a browser.
Sample Command:
http://evostream:EvoStream@52.91.237.115:8888/apiproxy/version
Note: username is “evostream” and password is the “computer name set”
See EMS HTTP JSON CLI for more details.
Checking the Password in Webconfig.json
The computer name will serve as the default password for the Proxy and Web UI authentication. The UID is obtained once a virtual machine is made. It can only be checked in the EMS webconfig.json. It is encouraged to change the default password for further security.
in webconfig.json:
apiProxy=
{
   authentication="basic",
   pseudoDomain="apiproxy",
   address="127.0.0.1",
   port=7777,
   userName="evostream",
   password="EvoStream",   --> password for proxy authentication