After creating the instance, EMS and its node components are already started. All you need to do is to connect to your EMS to be able to use it. Here are the steps on how you can connect to EMS using SSH Terminal, Windows PuTTy, EMS Web UI and EMS HTTP Based API.
Note: Restart EMS is you have made changes in config.lua or webconfig.json
Connecting to EMS on Linux
SSH via Terminal
Connecting to your new instance via SSH is exactly the same as connecting to any Linux EC2 computer. You will access it using the “ubuntu” user and use the .pem key you chose during Instance setup.
-
Locate the .pem (key file) in the terminal
-
Send command:
ssh –i ./<evostream-keys.pem> ubuntu@<public_IP>Note: Public IP can be found on the Amazon instances. See Determining Public IP.
test@ubuntu:~/Desktop$ ssh -i ./evostream-keys.pem ubuntu@52.91.237.115 The authenticity of host '52.91.237.115 (52.91.237.115)' can't be established. ECDSA key fingerprint is ae:02:ee:41:ff:38:96:ab:78:7b:3a:e6:09:ed:1f:4c. Are you sure you want to continue connecting (yes/no)? -
Input “yes”, press Enter
Welcome to Ubuntu 14.04.2 LTS (GNU/Linux 3.13.0-46-generic x86_64)

	Documentation:  https://help.ubuntu.com/
 System information as of Wed Jan 20 09:11:53 UTC 2016
 System load:  0.0               Processes:           106
 Usage of /:   13.9% of 7.74GB   Users logged in:     1
 Memory usage: 2%                IP address for eth0: 11.22.33.44.55
 Swap usage:   0%
 Graph this data and manage this system at:
   https://landscape.canonical.com/
 Get cloud support with Ubuntu Advantage Cloud Guest:
   http://www.ubuntu.com/business/services/cloud
EMS Web UI
Using a browser, you can access your EMS with the help of UI. The EMS and its UI are started by default, all you need to do is to open the UI in your browser:
format: <EMS_IP>:<WebUI_Port>

example: 55.66.77.901:4100
This will redirect you to the login page. Log in using the following:
Username: admin
Password: <InstanceID>
After logging in, you may change your password in the Web UI’s Profile page  .
.
To more know about the the EMS Web UI, please click here.
HTTP Based API
For integration with the EMS at the software level, using the HTTP Based API is often much more useful. The full set of API’s available to you are found here: API Definition.
For the EMS on AWS, the HTTP based API is exposed, but it requires authentication to be used. We call this Proxy Authentication. Basic Authentication is used and so just a username and password are required:
- Username: evostream
- Password: “Amazon Instance ID” - this will need to be obtained via your Amazon account as explained above.
Command will take this general format:
http://Username:Password@IPAddress:Port/apiproxy/CommandName?params=<base64EncodedString>
Run the command in a browser. Copy the command in a browser URL then press Enter.
Sample Command:
http://evostream:i-013c03dc9bab9d69f@52.91.237.115:8888/apiproxy/version
Note: username is “evostream” and password is the “instance ID”
See EMS HTTP JSON CLI for more details.
Connecting to EMS on Windows
Windows PuTTy
Pre-requisites
-
PuTTY Generator
-
PuTTY Secure Shell Client
-
Key file
Key File Conversion
EvoStream Media Server configuration can be accomplished using SSH and a client. Public AMI instances use a public/private key pair to log in instead of a password. The public key half of this pair is embedded in your instance, allowing you to use the private key half to log in securely without a password.
On Windows operating systems, you can open a secure session to your Amazon EC2 instance by using the PuTTY Secure Shell client, which you can download here.
The first thing you’ll need to do is convert the private key. The PuTTY Secure Shell client doesn’t natively support the private key format generated by Amazon EC2. Fortunately, PuTTY has a tool called PuTTYgen that you can use to convert your private key to the required PuTTY Private Key File (*.ppk) format. To convert the [key-pairname].pem file that you created to a [key-pair-name].ppk file, do the following:
-
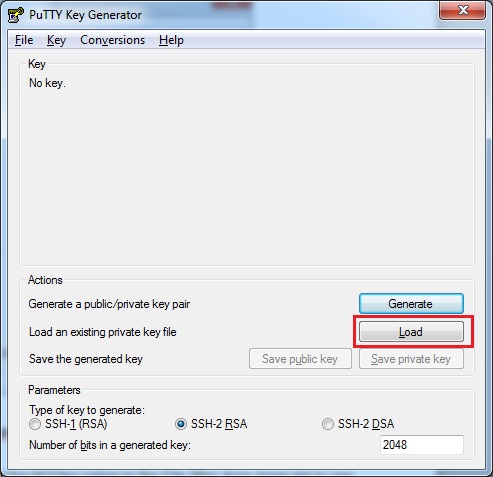
Run PuTTY Key Generator
-
Click Load button
-
Select and open the .pem file that you want to convert in the Load private key window.
Note: You’ll need to select the All Files option in the File filter drop-down list to see PEM files in the file list.
-
Click OK in the PuTTYgen Notice window

-
Click Save private key and save the file with the name [key-pair-name].ppk.
Connecting via SSH
-
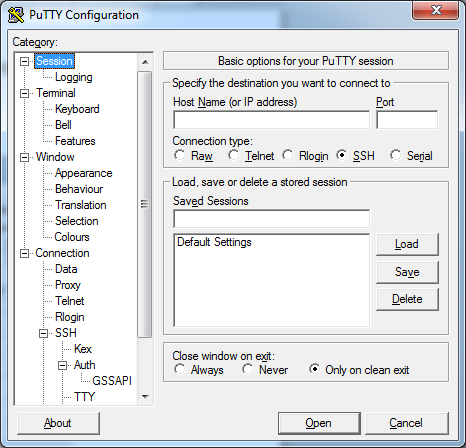
Run PuTTY
-
Select Session under the category tree
-
Specify the destination you want to connect to:
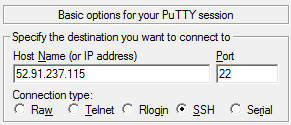
Host Name – the public IP address in Amazon EC2 instance running EvoStream Media Server
Port – 22 (default)
Connection type – SSH
-
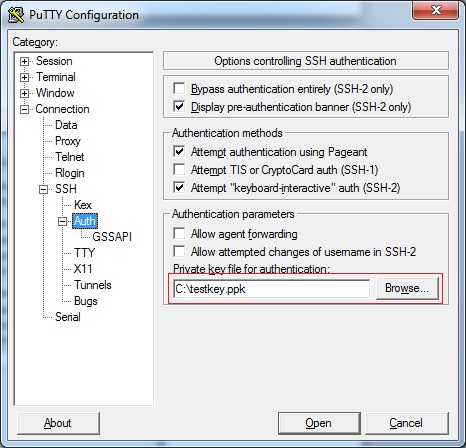
Select Auth under Connection > SSH in category tree
-
Click the Browse button to find and open the [key-pair-name].ppk file
Note: If you will be opening this same session later, you can save it for future use
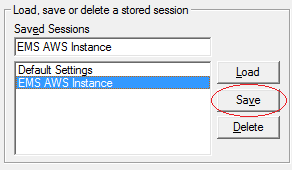
To save the session information:
On the Basic options for your PuTTY Session page, enter a name for the session in Saved Sessions, and then click the Save button
-
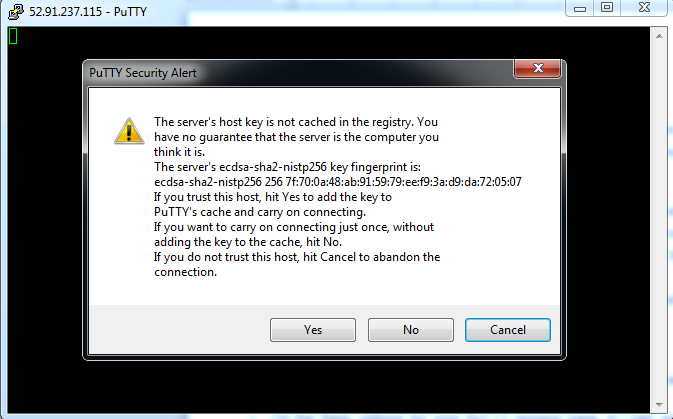
Click the Open button to open the secure SSH session. The first time you connect to your instance, you’ll get a PuTTY Security Alert that references the first use of [key-pair-name].pem
-
Click Yes to accept the security key
-
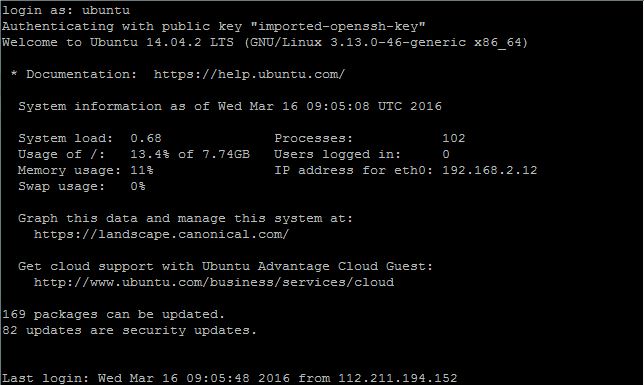
Logged in as “ubuntu”
-
If you previously saved the SSH session information for this Amazon EC2 instance, do the following:
-
Run PuTTY
-
Select Session in the category tree
-
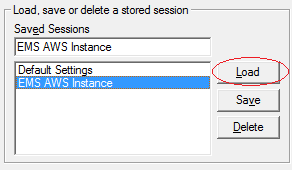
Select the Saved Session and then click the Load button
-
Click the Open button to open the secure SSH session.
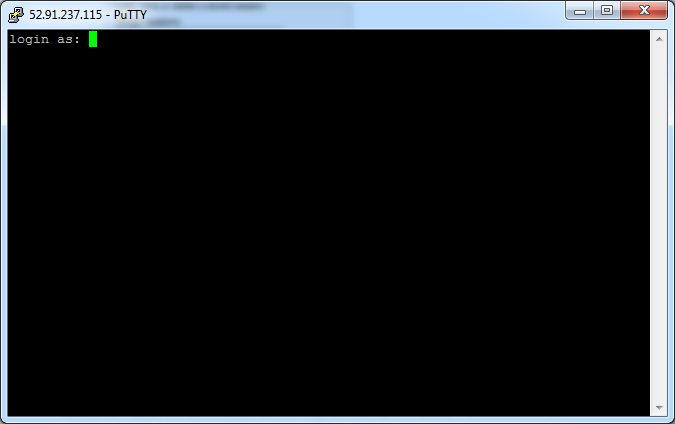
Note: You should see the login as: prompt in the SSH client window. Enter “ubuntu” as the username
EMS Web UI
Using a browser, you can access your EMS with the help of UI. The EMS and its UI are started by default, all you need to do is to open the UI in your browser:
format: <EMS_IP>:<WebUI_Port>

example: 55.66.77.901:4100
This will redirect you to the login page. Log in using the following:
Username: admin
Password: <Instance ID>
After logging in, you may change your password in the Web UI’s Profile page .
To more know about the the EMS Web UI, please click here.
HTTP Based API
The above instructions gave you access to the EMS via the command line. For integration with the EMS at the software level, using the HTTP Based API is often much more useful. The full set of API’s available to you are found here: API Definition.
For the EMS on AWS, the HTTP based API is exposed, but it requires authentication to be used. We call this Proxy Authentication. Basic Authentication is used and so just a username and password are required:
- Username: evostream
- Password: “Amazon Instance ID” - this will need to be obtained via your Amazon account as explained above.
Command will take this general format:
http://Username:Password@IPAddress:Port/apiproxy/CommandName?params=<base64EncodedString>
Run the command in a browser. Copy the command in a browser URL then press Enter.
Sample Command:
http://evostream:i-013c03dc9bab9d69f@52.91.237.115:8888/apiproxy/version
Note: username is “evostream” and password is the “instance ID”
See EMS HTTP JSON CLI for more details.