Quick Start Guide for Microsoft Azure
Purpose
This document describes how to set up a virtual machine with EvoStream Media Server software on Microsoft Azure, an open, flexible, enterprise-grade cloud computing platform.
Microsoft Azure is a cloud-computing platform that virtualizes computing resources as virtual machines. EvoStream provides a Linux and Windows machine with a preconfigured version of EvoStream Media Server that is ready to start using Azure services. You can use this machine to launch EMS, paying for your running instance time and bandwidth consumption only while the instances are running. You can launch EMS instances in specific geographical locations that are closer to your audience to reduce latency and in multiple geographical locations to provide high levels of redundancy.
Getting Started
Pre-requisites
-
Microsoft Account
Setup Virtual Machine Environment
To get started with the EvoStream Media Server (EMS) on Azure, the first thing to do is to setup the virtual machine by simply following these steps:
- Quick-Deploy: Steps 1 and 2 below can be skipped by clicking one of the following buttons:
- Quick-Deploy EvoStream Media Server 1.7.1 for Windows Server 2012 R2

- Quick-Deploy EvoStream Media Server 1.7.1 for Ubuntu 14.04 64-bit
- Quick-Deploy EvoStream Media Server 1.7.1 for Windows Server 2012 R2
-
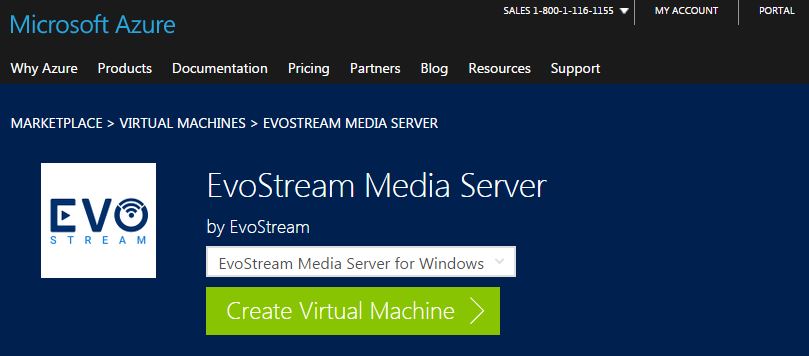
Search for the EvoStream Media Server in the Azure marketplace, or simply follow this link:
https://azure.microsoft.com/en-us/marketplace/partners/evostream-inc/evostream-media-server/
-
Select the operating system for the virtual machine to be created. Click on Create Virtual Machine button.
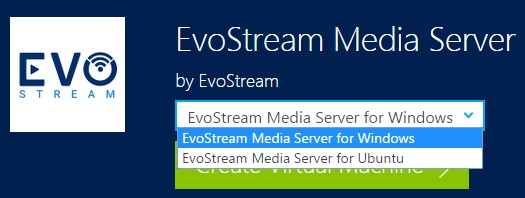
Images available:
- EvoStream Media Server for Windows - Windows Server 2012 R2
- EvoStream Media Server for Ubuntu - Ubuntu 14.04 64-bit
-
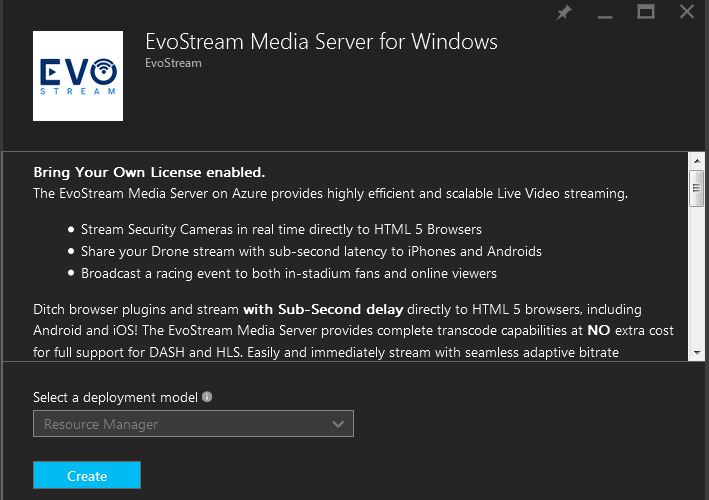
Sign in your Microsoft Azure account if not yet signed in. You will be redirected to the EvoStream Media Server page. Read on the notes and if ready, click on the Create button.
-
Configure the virtual machine settings based on your preferences
-
Review the Settings, Offer Details and Terms of Use then click Purchase to start the deployment
-
To check if the image has been created, on the Microsoft Azure Dashboard, click on the Virtual machines. You will now see the image created once the deployment succeeded.
Note: The machine is started after the deployment
Connecting to EMS machine
All the virtual machines in your account is seen under the Virtual machines in the left-side menu bar.
Click on the Virtual Machine name. Click on Start.

Connecting via SSH from Linux Terminal
-
Send command:
ssh <username>@<IP_address>The username and password is set in step 4 above.
user@ubuntu:~/Desktop$ ssh user@11.221.105.202 The authenticity of host '111.221.105.202 (111.221.105.202)' can't be established. RSA key fingerprint is ae:02:ee:41:ff:38:96:ab:78:7b:3a:e6:09:ed:1f:4c. Are you sure you want to continue connecting (yes/no)? -
Input “yes”, press Enter
Warning: Permanently added '111.221.105.202' (RSA) to the list of known hosts. user@111.221.105.202's password: -
Enter password, press Enter. A welcome note will open. You then need to install the license to be able to use the EMS capabilities.
Note: The license should be placed in /etc/evostreamms for Linux and in ./config in Windows
Connecting via SSH from Windows (PuTTy)
Pre-requisites:
- PuTTY Secure Shell Client
-
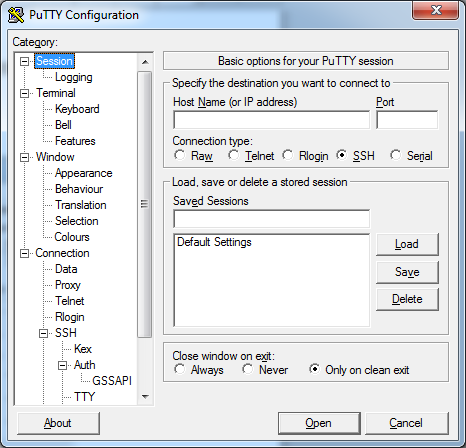
Run PuTTY
-
Select Session under the category tree
-
Specify the destination you want to connect to:
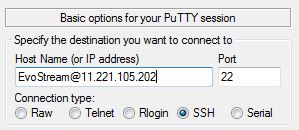
Host Name – the username and public IP address in Azure virtual machine running EvoStream Media Server
Port – 22 (default)
Connection type – SSH
-
Click Open
-
Click Yes to accept the security key on the PuTTy Security Alert Window
-
Enter the username’s password, hit Enter
Using username "EvoStream". EvoStream@111.221.105.202's password: -
You are now connected to the machine! You then need to install the license to be able to use the EMS capabilities.
Note: The license should be placed in
/etc/evostreammsfor Linux and in./configin Windows
Connecting via Remote Desktop
-
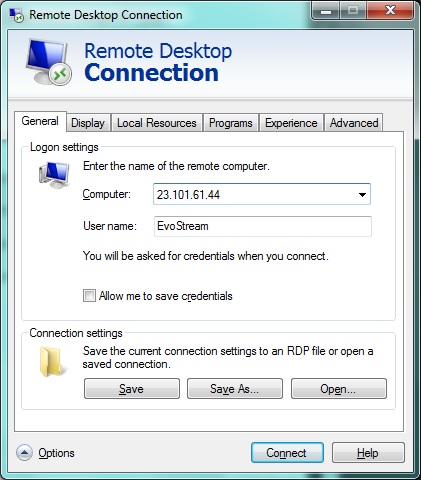
Run the Remote Desktop Application to be used
Note: The remote desktop application will depend on the OS you will use.
-
Enter the details of the virtual machine image, click Connect
Computer - the IP address of the image
Username - the username set for the image
-
Enter the password for the user, click OK
-
The connection will be established. You may now install the license to use the EMS capabilities!
Note: The EMS is installed in
C:\EvoStream
EMS Web UI
While most work with the EMS happens at the command line or through the HTTP based API calls, the EMS does have a Web UI that can be used. To access the UI simply point your browser at the proper URL: http://<DomainOrPublicIP>:8888/EMS_Web_UI/index.php
< DomainOrPublicIP > will need to be replaced with the Public Domain or Public IP of your new EC2 Instance.
Determining Public IP
-
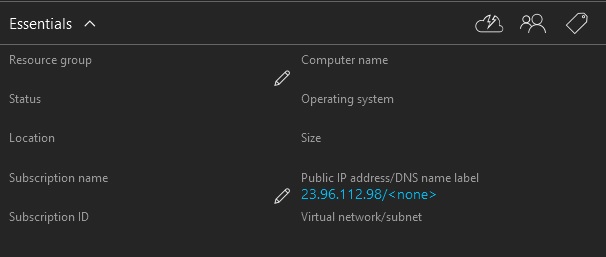
Sign in to http://portal.azure.com/
-
Click on virtual machine created under Virtual Machines menu
-
Start the virtual machine
-
In the Essentials pane, the Public IP address/DNS name label is displayed
Note: The IP address is changing everytime the virtual machine is restarted
Authentication
The authentication is only enabled starting the 1.7.1 version of EMS. The Authentication is enabled by default in EMS Web UI and HTTP Based API.
Login for Web UI
The Web UI is protected by default when using the EMS on Azure. When accessing the Web UI you will be prompted for a username and password.

- Username: evostream
- Password: “UID” - the unique identifier of the virtual machine, this will be seen in webconfig.lua
HTTP Based API
For the EMS on Azure, the HTTP based API is exposed, but it requires authentication to be used. We call this Proxy Authentication. Basic Authentication is used and so just a username and password are required:
- Username: evostream
- Password: “UID” - the unique identifier of the virtual machine, this will be seen in webconfig.lua
Command will take this general format:
http://Username:Password@IPAddress:Port/apiproxy/CommandName?params=<base64EncodedString>
Sample Command:
http://evostream:i-D817E76F-B6F2-CC4F-ACAC-EAE9D84CEE3F@52.91.237.115:8888/apiproxy/version
Note: username is “evostream” and password is the “UID”
See Proxy Authentication for more details.
Getting the Unique ID
The UID will serves as the password for the Proxy and Web UI authentication. The UID is obtained once a virtual machine is made. It can only be checked in the EMS webconfig.lua.
in webconfig.lua:
apiProxy=
{
   authentication="basic",
   pseudoDomain="apiproxy",
   address="127.0.0.1",
   port=7777,
   userName="evostream",
   password="D817E76F-B6F2-CC4F-ACAC-EAE9D84CEE3F",   --> sample UID
}
Terminating EMS machine
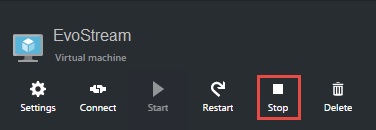
Stopping EMS machine
When you want to stop the virtual machine, fret not, all the changes remains in the server. The machine is only in suspended.
- Click on the Virtual machine menu
- Right click on the virtual machine name, click on Stop
- or, simply click Stop on the virtual machine window
- Confirm stopping the virtual machine by clicking Yes
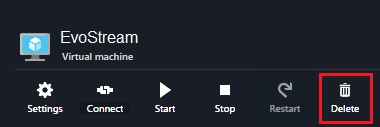
Deleting EMS machine
Deleting the EMS virtual machine will remove all the changes and the virtual machine itself in the Azure Virtual Machine list.
- Click on the Virtual machine menu
- Right click on the virtual machine name, click on Delete
- or, simply click Delete on the virtual machine window
- Choose if you want to delete or keep the attached disk